Know exactly how much you’re risking on every trade
Automatically calculate perfect position sizes in seconds — protecting your capital while maximizing your edge. One wrong calculation can wipe out weeks of profits. Never risk it again.
Help you pass your funded account evaluation
Our tool allows you to offset the account balance, a vital feature for traders attempting to pass a funded account evaluation or managing funded accounts with strict risk limits. For example, if you have a $25,000 evaluation or funded account but an allowed drawdown of only $1,500, you can set an offset of -$23,500. This adjusts the effective trading capital to $1,500, ensuring the tool calculates risk percentages based on the actual available funds.
Avoid the #1 evaluation killer
Many new traders risk too large a percentage of their capital per trade, violating the evaluation or funded account risk guidelines. Even a solid strategy can fail if risk is not properly managed, quickly blowing the account. Use the balance offset to stay within safe risk parameters and protect your funded account.
Trade any strategy, any risk model
% of account balance
Risk a consistent percentage on every trade—say 1%—and the tool automatically calculates your position size. As your account grows or shrinks, your positions scale accordingly. Simple, precise, no math required.
Tip: Base calculations on Cash Value, Buying Power, Cash Balance, or Net Liquidation—whatever fits your strategy.
Fixed dollar amount
Risk the same dollar amount on every trade, regardless of account balance. Set it once—like $200—and the tool calculates the optimal position size without exceeding your limit.
Note: During losing streaks, your account depletes faster than percentage-based risk. During winning streaks, it grows more slowly.
Fixed quantity
Trade a set number of contracts every time—no calculations, just the fixed quantity you choose.
For experienced traders only: This method doesn’t adjust for risk or instrument size (ES is 10x larger than MES). New traders should start with percentage of account balance.
Master your trade exits with ease
Ready to lock in profits step-by-step? This tool lets you choose anywhere from zero up to 5 profit targets, giving you complete flexibility to trade your way. Plus, you get to decide what percentage of your position to close at each target, giving you full control over your trade exits. You can even opt to have targets automatically set based on your own defined R value.
Multiple automated Breakeven and Trailing Stop settings for smarter trade management
Whether you want to lock in profits or ride the trend, choose from several automated breakeven and trailing stop settings that adapt to your trading style, making trade management smarter and simpler.
Trade any instrument
This powerful tool supports all instrument types available on NinjaTrader 8: CFDs, Cryptos, Index, Forex, Futures, and Stocks.
Trading instruments in different currencies?
If the instrument’s currency differs from your account currency, the tool automatically converts all amounts to the account currency using the current exchange rate and adjusts the position size accordingly, ensuring accurate trade sizing.
Trade any way: Real or Sim, Live or Playback
Whether you’re trading a live or funded account, testing strategies on a demo, or replaying market action with NinjaTrader Playback, our tool has you covered. Experience flawless performance and accuracy across all trading modes, so you can focus on what matters: making smart trades.
Precise position sizing that includes commission costs
Forget surprises! Our tool automatically factors in your account’s commission fees when calculating position sizes, giving you razor-sharp precision and control over your trades. Trade confidently, knowing every cost is accounted for.
Trade multiple accounts effortlessly
Different accounts, different rules? Save unique settings for each account — your funded account, personal account, and evaluation account all configured perfectly.
Customize visuals and display options
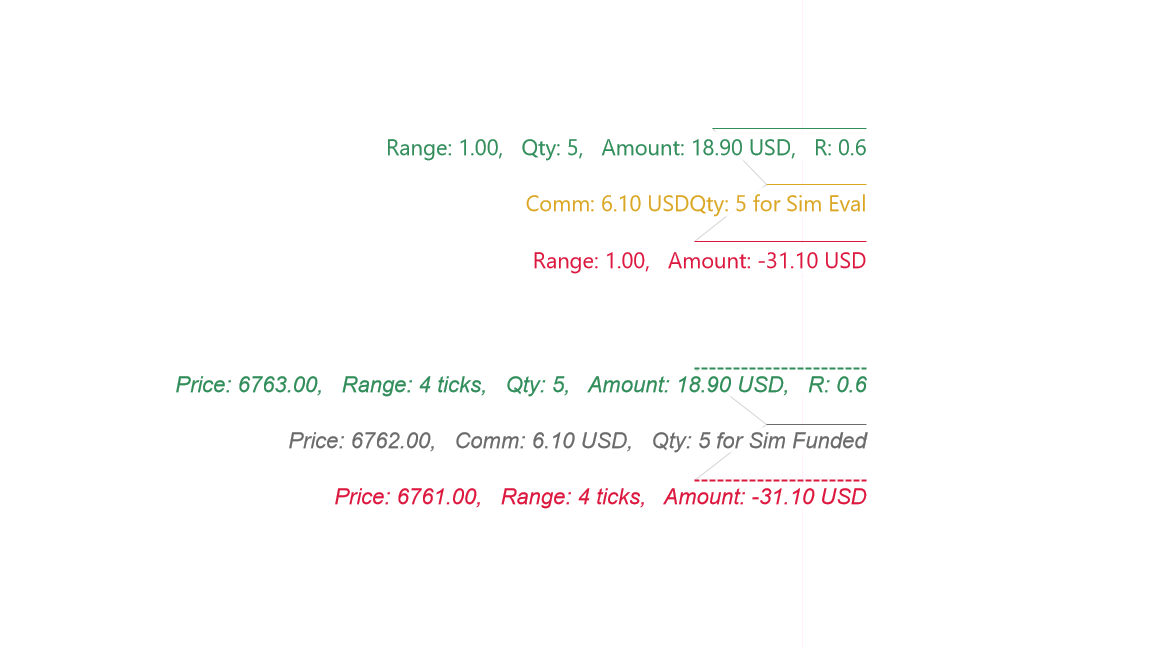
Fine-tune the appearance and information displayed on your position sizing drawing tool with flexible options. Choose which metrics to display, such as reward-to-risk ratio, price values, ranges, and dollar amounts. Control line extensions and visibility, and personalize line colors and types to match your chart’s style.
Secure, Private, and Local
Enjoy the power of our software installed locally on your device — no cloud, no data collection. We respect your privacy: how you use our tools and what you do with them stays on your computer. The only network activity is a simple license validation, so you can focus on your trading worry-free.
Want to explore all the features in detail?
Our comprehensive user guide covers setup, advanced functionality, and pro tips. View the user guide
Trusted by active traders
Loved by 22 customers — add it to your collection and you'll love it too!
I was looking for a quick and painless way to use position sizing, and I found it with this tool.
This is a great tool and it does not cause issues with NT.
Just have to tell you how much I value and appreciate the Ascendo Position Sizing Calculator. I used to use a manual calculator, which always took too long for me to get into the trade since I primarily scalp. Yours does the exact same thing so quickly on the chart that it allows me to relax and get into my trades without franticly rushing to do the proper manual calculations. I simply create a template based on my risk parameters and then with every trade I simply click where I want my stop to be, then my entry, and all orders, including my exits are automatically submitted. So darn easy and quick!! So, thank you!
This is an excellent product and customer support has been fantastic. Highly recommend.
I recently added the Automatic Position Size Calculator to my NinjaTrader 8 toolkit, and it has made a noticeable difference in my trading workflow. This tool allows me to set my entry, stop, and target with confidence and precision. It’s incredibly intuitive., what used to take me extra time and effort is now just a matter of a few clicks.Beyond the tool itself, I have to highlight the exceptional customer support from Ascendo. They’re always ready to help, and their dedication to their clients really stands out. Knowing I have such a reliable team backing this tool gives me extra peace of mind. I can genuinely say it’s a worthwhile investment for anyone serious about refining their trading process.
Hands down the best calculator on NT as of now, no question!!! Includes order placement with it as well.
Been using this fool for about a year and it enables me to trade price action on the 15 second chart (since it can auto place the orders and size the position.) No way i could create accurate position sizes otherwise. IMO all traders should have a position calculation/ order entry tool and this is a great one
The best tool out there and been using it for a few years now. Makes it much faster to enter orders. There are many new tools trying to copy it but they don’t compare. The last feature it’s missing is the option to limit total size of position from being a large percentage of an account when the stop size is very small. The tool is worth much more than the price!
I NEVER take the time to review a product but I have to say this is the best entry tool I’ve in years and years. If your are a scalper / day trader you’ll be able to enter your orders in less than 2-3 seconds (risk + lot size included + stop loss + take profit all included and so many more options !).Worth even penny, DO NOT hesistate on that purchase as I can promise to you, you won’t regret it !Great job by the developers you guys are killing it !
I LOVE this tool! I think it forces many correct trading habits by the design of the tool. First, it forces me to place my stop first which, when approaching a trading idea, it’s critical that my stop be at a point of invalidation and when I don’t have to think about placing the stop first, I often bring in the stop too tight to increase my position size and get stopped out prematurely on valid trade ideas. Second, it takes away all the thinking and converting my risk amount to the number of contracts I can buy based on my risk. This allows me to simply look at the charts and trade the pattern and trade ideas instead of worrying about the dollars behind the trade. This has helped me become better at focusing on the process of trading instead of the dollars and the money is coming easier than ever.10/10 recommend this trading tool!
Position size calculator & order manager
Drawing tool for NinjaTrader 8.
Terms
Lifetime License.
Pay once, use forever on 1 computer.
Free updates for 1 year.
30-day money-back guarantee.
Compatible with NinjaTrader 8 desktop version 8.1.2.0 or later.
Not compatible with NinjaTrader Mobile Trading App.
Not ready for a one-time purchase? Try our Subscription service to enjoy all our products.
Release notes
- Add Help section in the Properties with URL to user guide and tool version.
- Add option to use the Trailing Max Drawdown for NinjaTrader Brokerage accounts.
- Add an option to adjust the vertical offset of the text relative to the anchor lines.
- Add option to submit a market order when the current bar closes.
version 18
December 19, 2025
- Improved compatibility with NinjaTrader version 8.1.6.0
- We’ve migrated to a new, more reliable licensing system that no longer depends on the NinjaTrader Machine ID. This eliminates license instability caused by Windows updates, BIOS changes, and duplicate Machine IDs, ensuring your license works consistently without requiring frequent reactivation.
- Now properly support high DPI screen with MS Windows display scaling.
- Breaking change: Some fundamental names and structures in the code have been changed, making version 17 incompatible with existing settings from prior versions. Please follow the steps outlined on this page for a smooth upgrade process.
- Bug fix: There are no more errors when canceling a new drawing instance before it is drawn.
- Bug fix: Resolve issues related to the Group 2 account-specific settings.
- Improvement: Reduce latency in calculating the auto breakeven price, resulting in orders being sent faster.
version 16.2
February 19, 2025
- Bug fix: When the option to offset the entry and/or the stop is active, the quantity of the Stop and Target orders now matches the quantity of the Entry order.
version 16.1
August 4, 2024
- Bug fix: The breakeven rules are now working when using the single stop option.
- Add the option to place the entry order even if one of the targets has a quantity of zero, provided that the entry order quantity is at least 1.
- Add the option to automatically submit the entry order but only when the ALT key is down.
- Now, with the option for automatic order submission, users can bypass the automatic submission by holding down the ALT key.
- Add a Group 2 account specific settings. This now allows to have 3 different set of settings for at least 3 different accounts.
- Add the option to draw a coloured rectangle for the risk area and for the reward area.
- Add the option to use a single Stop Order. This proves especially beneficial for stock trading, given the commission cost structure. Employing a single Stop Order can effectively reduce commission expenses should the price trigger the stop.
- Add the option for customizing font attributes (family, style, size) for all drawn text.
- Add new visible text displaying the total sum of amounts in $ for both the current reward and all previous rewards.
- Implement logic for auto breakeven to prevent moving the stop back to increase risk if the user previously manually adjusted the stop to reduce risk, bringing it closer to the target than the breakeven price value.
- Bug fix: All partial fills are now managed correctly. In earlier versions, if an entry was partially filled and subsequently the target was filled, the associated stop and target orders were not generated when the price returned to complete filling the entry. This functionality has now been rectified, including improvements for handling other partial fills.
- Incorporate Machine ID validation to promptly alert users via a notification window as soon as the Machine ID changes, ensuring timely notification rather than relying on NinjaTrader to notify when the license expires.
- Bug fix: Resolve an issue affecting MBT and potentially other instruments that caused the tool to disappear when drawing it.
- Add option to automatically move the Stops to breakeven.
- Add option to automatically trail the Stops.
- Now the pre-defined risk values for the context menu are separated by the semicolumn character instead of the comma followed by a space. This makes it easier for countries that use the the comma , as decimal separator.
- Add special logic when the selected instrument is a CFD using cTrader to properly calculated the position size to match the cTrader platform.
- Add option to hold the Alt key down to not submit an entry order when the Auto Order submission option is active.
- Bug fix. Now when moving a Stop anchor or the Entry anchor or when changing the properties, the position size is always re-calculated properly
- Bug fix: Now the green dot for auto entry order submission is visible when the lines are extended left.
- Add option to offset the Account amount value.
- Fix bugs with the Market Orders submission for the Entry
- Fix bugs when the Entry Order get partially filled
- Add option to use MIT order for Entry and Targets.
- Fix a problem that caused the Automatic Order to not be submitted when the option to not use a Target for the last reward is active.
- Fix a problem that could cause the chart window to freeze when using the SHIFT key to snap Entry price to current price.
- The settings on the Properties window have been reordered to group them to make it easier to follow. When you hover your mouse cursor over the settings a description of the setting is now visible.
version 11.1
March 24, 2023
- Add option to draw the Reward to Risk projection lines calculated by amount net values or simply by ticks.
- Bug fix: Sometime when the Risk Template option was empty an error message was incorrectly generated in the log
- Bug fix: Fix the location of the news events files to be in line with the latest version of the News Events indicator. Before this fix, for some users, it was possible that the tool did not refresh and re-calculate properly after changing the settings in the Properties windows.
- Bug fix: When the user change the Reward scale out percentage between the applicable reward (targets) and the sum of all scale out percentage is less than 100%, then the tool will show a warning window as before but will also automatically replace the scale out percentage with the default values when you install the tool. This is to prevent the user to submit an order while the sum of all scale out percentage is less than 100% which would lead to a portion of the trade to not be managed by the associated Stop and Target orders
version 11.0
March 19, 2023
- You now have the option to use Market Order to enter when holding down the Shift key while the “Automatically place the Entry order” option is active.
- Add an option to not use a target for the last reward
- Add an option to calculate the auto target either from ticks ratio or from net amount of risk in $
- Add an option to view the Reward to Risk ratio values over the projection lines
- Add an option to send Pushover alert when the Entry Order get filled. Also add an option to send a Pushover alert when either the Stop or Target Order get filled.
- Fix a rounding issue when the risk method is fixed size
- Fix an issue with Partial fill orders so now the associated Stop and Target orders should always match the current quantity filled until completely filled.
- Auto Targets improvement: When the Target Auto Ratio is active (higher than 0) and the option called “Allow manual override of auto target” is not active, when the mouse is moved over the target anchor, the mouse cursor change to the red circle to advise the trader that anchor can not be moved manually.
- Remove the AutoLock option
version 10.0
October 24, 2022
- Add option to view the Net Reward to Risk ratio
- Add option to show lines for user selected Reward to Risk ratios.
- Add option to stagger the Stop Order in order to be able to manage each of them independently from the chart.
- Add option to bypass the exchange rate calculation.
- Add option to round the position size quantity from the first or the last reward (target).
- Improvement to order entry: now all entry order will either be a Limit Order or a Stop Order (the Stop Order can be a Market Order or a Stop Limit Order.
- Fix to prevent to see additional selection points (the small donut representing the anchor points, where the user can select the point to move it).
- New feature: There is a new option in the properties to allow to snap the Entry anchor price to the current market price by holding the Shift key down.
- New feature: There is a new option in the properties to allow to manually override a target anchor that was automatically set with a Reward auto ratio.
- Fix: Add logic to prevent being able to resubmit the orders for old Position Size drawing tools for which an order was already submitted after restarting NinjaTrader or restoring a workspace.
- It is now impossible to submit the order if the bracket order parameters are invalid, for example by having both the Risk and Reward anchors below the Entry anchor.
- Fix the Automatic Reward to Risk calculation for the targets. Now the commission cost is included into the ratio calculation.
- Add option to automatically submit the entry order upon finishing drawing the tool.
version 7.0
February 8, 2022
- Add the option to use a Buy/Sell Stop Limit order instead of a Buy/Sell Stop Market order for the Entry.
- Add the option to set a pre-defined Reward to Risk ratio for setting the target price. With this option enabled, it is not required to draw the target(s) line, instead the target will be automatically calculated from the user defined ratio.
- Add the option to set a pre-defined offset in ticks for the Stop price and the Entry price.
version 6.0
December 8, 2021
- Now if the Stop anchor is moved while the entry order is working (pending getting filled) the Stop and Target quantity do not get updated with the new Stop anchor price.
- Now the associated Stop and Target(s) orders to a pending entry order that get partially filled are handled properly.
- Fix the logic to get the account value from accounts which have different ‘Account Display Name’ and ‘Account Name’.
- Add the round trip commission cost into the calculation of Risk and Target(s) amounts.
- Improve the Reward to Risk ratio calculation. The R:R is now calculated from the net Risk amount to the net Target amount (including the round trip commission cost).
- Improve the position size qty calculation to ensure the dollar amount of risk never exceed the allowed risk amount.
- Now a popup message will alert the user if a Position Sizing drawing tool is drawn with the sum of all applicable ‘Reward Scale Out values’ that is less than 100.
- It is now possible to calculate the Risk from % of Account:
- Cash Value
- Buying Power
- Cash Balance
- Net Liquidation
- Add an option to allow changing the Risk calculation method from the right click menu on the drawing tool.
- Add an option to allow changing the Risk Value from a range of user configurable predefined risk values from the right click menu on the drawing tool.
- The maximum position size now uses the Risk template
- Add option to automatically lock or not the drawing tool upon finishing drawing it
- Improve the OCO order handling for Stop(s) and Target(s). Now the Stop(s) and Target(s) OCO orders will be placed even if the Position Size drawing tool is deleted or its properties modified while the submitted entry order is pending getting filled.
- Improve how a rejected entry order is handled.
version 4.2
August 28, 2021
- Add option to set a maximum position size.
version 4.1
August 25, 2021
- Fix the Stop quantity calculation when using more than 1 target.
- Change the name of the Entry to append the number of targets. ie for 3 targets the entry name will be Entry 3t.
- Change the name of the Stop and Target to append the actual total target number. ie for 3 targets the first target will be Target 1 of 3, the second target will be Target 2 of 3 and so on. This makes it easier to follow which Stop and Target goes with which Entry.
- When our Pushover add-on for NT8 is installed, a Pushover notification will be sent when a pending order get executed.
- Add an option to round to Forex lot size.
- Fix a quantity calculation issue with JPY Forex pairs.
- Fix an issue that sometime caused the quantity to be recalculated when restoring a workspace or restarting NinjaTrader. Now all the visible text is saved for all Position Size drawing tools drawn so after restarting NinjaTrader, the original text and values will be visible.
- Add an option to automatically cancel pending orders that are within a restricted trading time based on the economic calendar news events and then resubmit the pending order once the news time restriction is over.
- Add an option to save different parameters value for a specific account.
- Add icons for the drawing tools menu.
version 3.0
August 5, 2021
- Add risk calculation by percentage of account balance.
- Add currency conversion such that the risk amount will be calculated based on the account currency.
- Add up to 5 targets for scaling out the position.
version 2.0
October 4, 2020